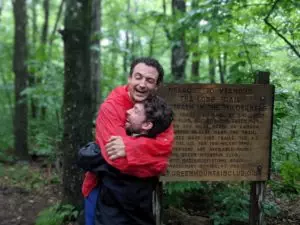
This is a five-part series on winter hiking by Aubri Drake. Aubri has winter hiked the New Hampshire 48 4000 Footers, the New England 67 4000 Footers, the New England Hundred Highest, and many of the Adirondack 46ers, most often solo. They’ve hiked in temperatures as cold as -20F actual/-50 windchill, broken trail alone through 2+ feet of freshly fallen snow, bumped into a moose in a snowstorm, waded through waist-deep snow, and still have all of their toes and fingers. Simply put, Aubri has spent more time winter hiking than many of us have spent at the gym:
- Winter Hiking 101
- Assessing Winter Conditions in the White Mountains
- Essential Safety Preparations for Winter Hiking
- Tricks for Hiking in Polar Opposites – Vortex and Thaw
- Winter Gear Roundup – (congrats, you’re here!)
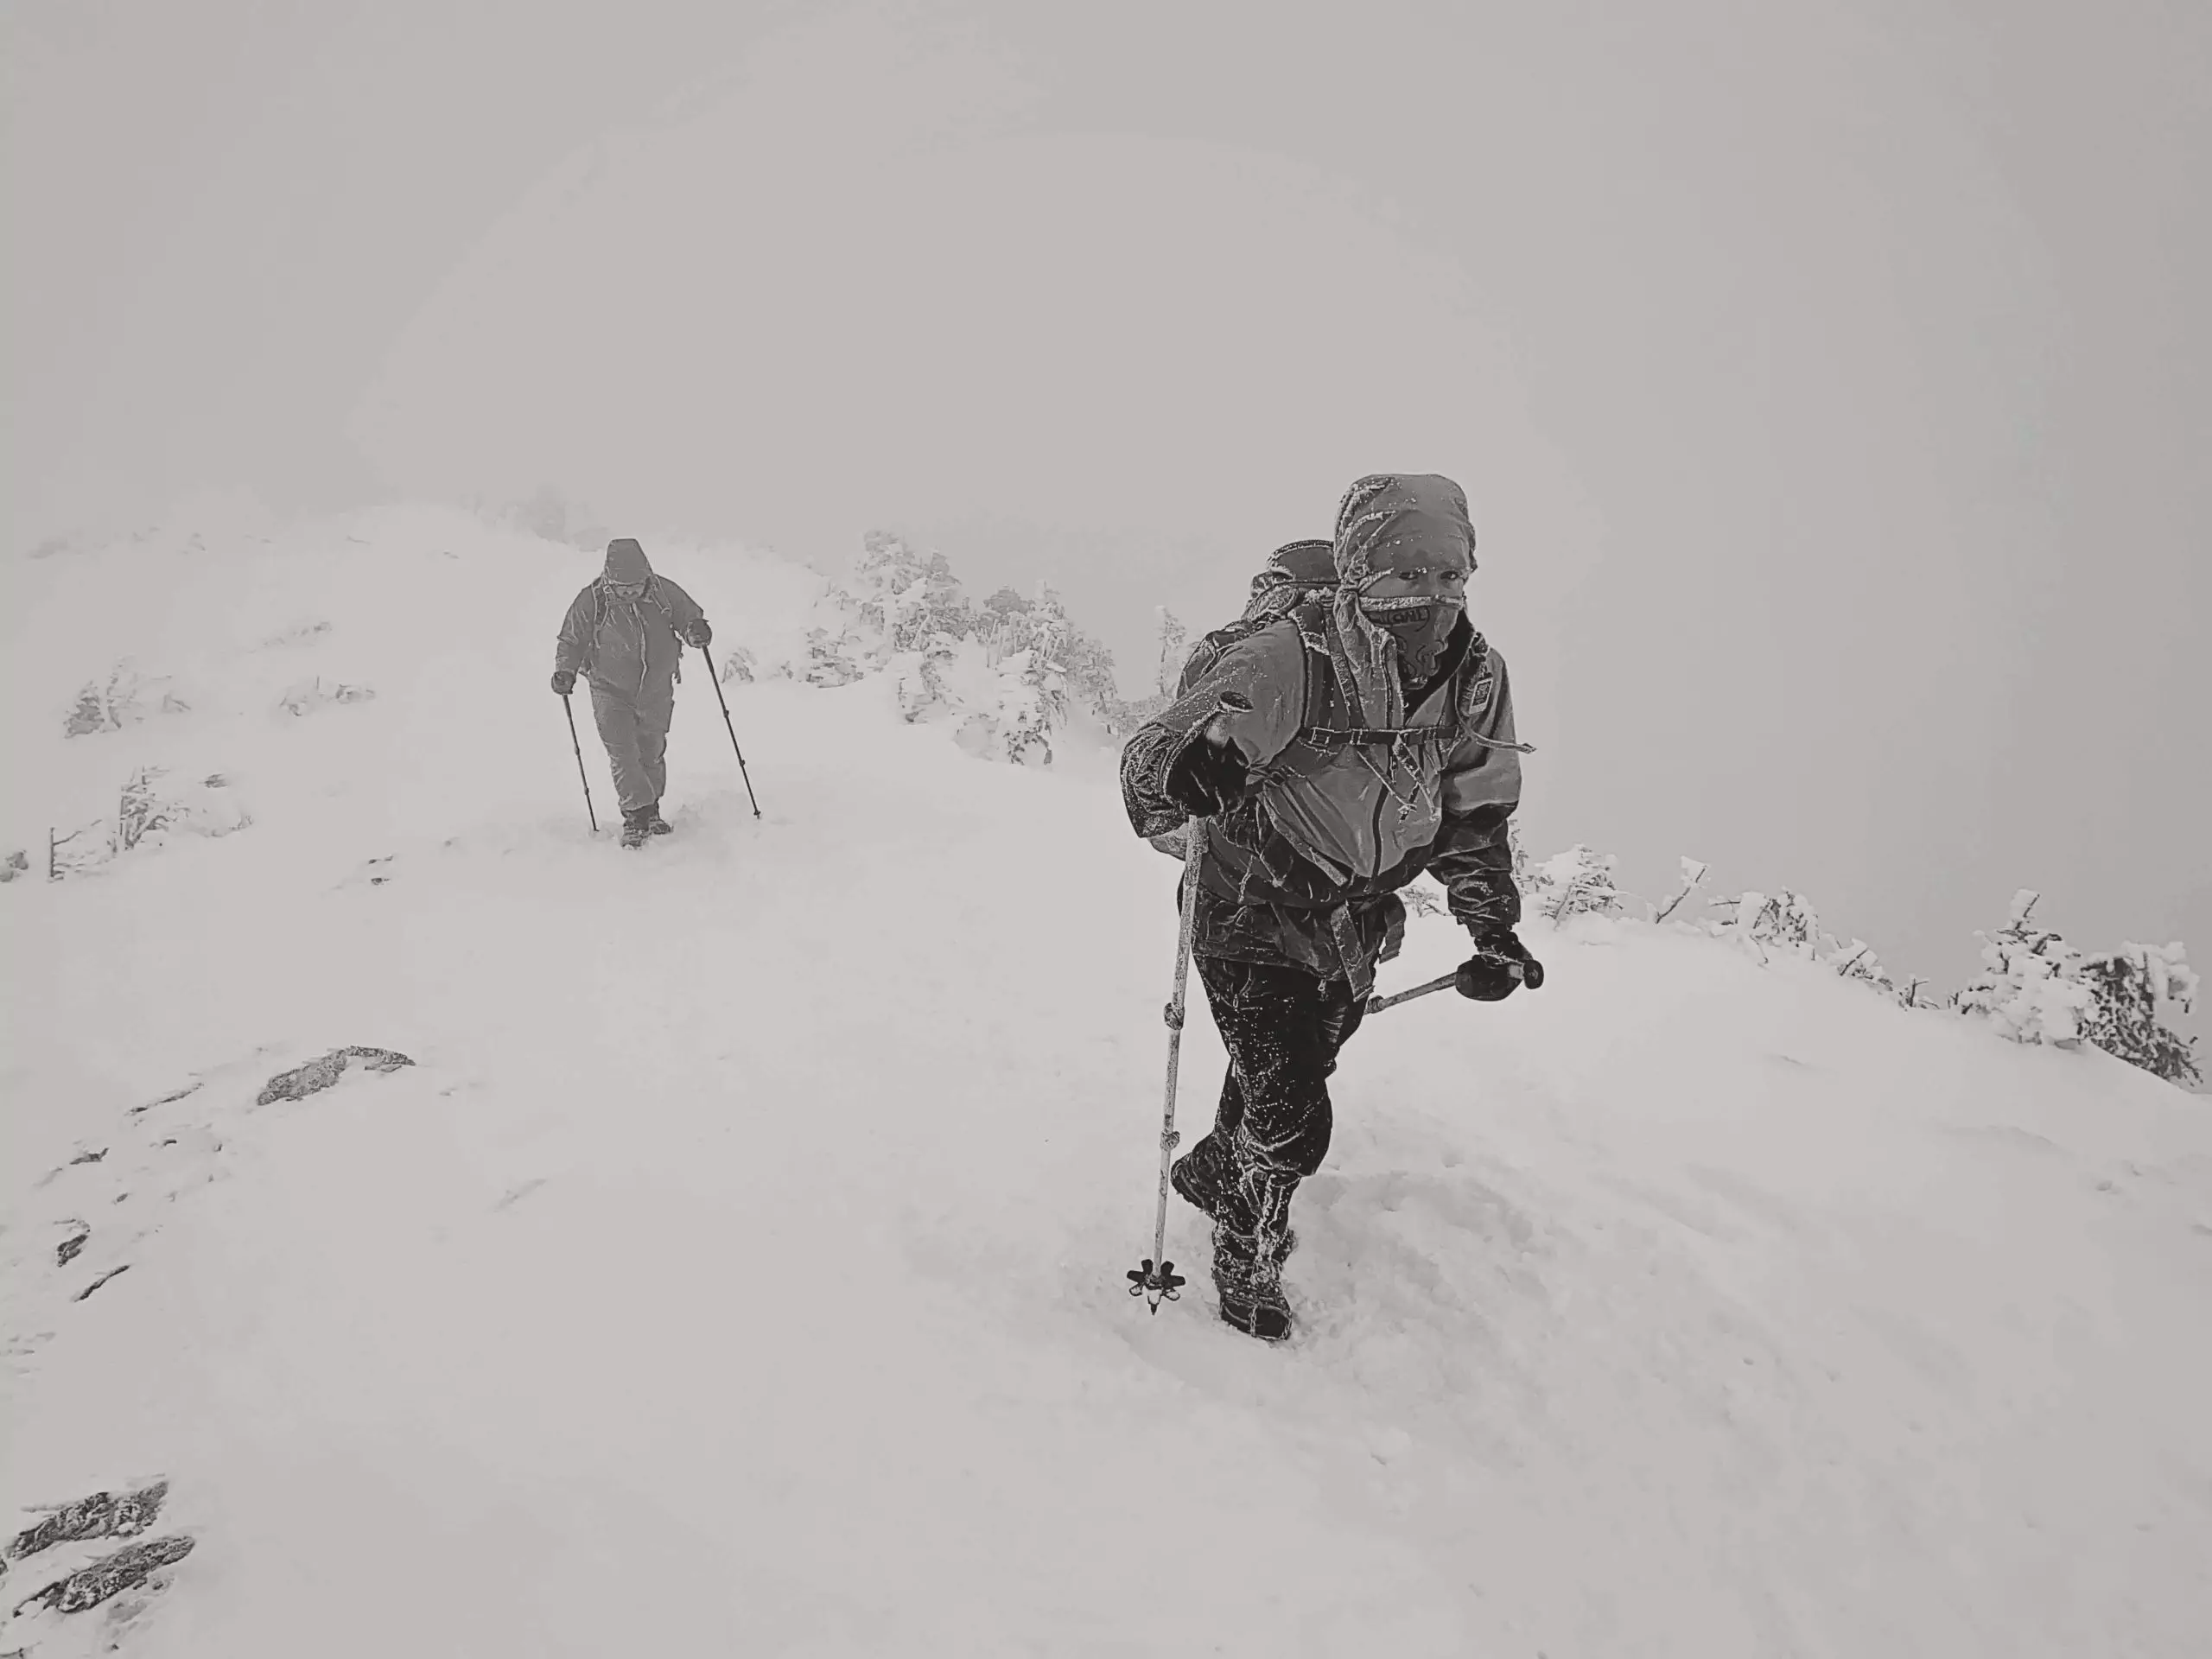
Winter hiking is a complex web of moving parts. This article’s scope will be limited to discussing day hikes in non-technical conditions; there will be no discussions of ice axes, ropes, overnights, glaciers, or avalanche preparedness.
Gearing up for winter hiking and running conditions can be intimidating. The number of layers required to stay warm is numerous and the cost can add up quickly. And there are so many options and so many people declaring they have the best product. Over the years, I’ve used a lot of winter gear, and here are some of my favorite items that have stood up to the wear and tear of extensive hiking and bushwhacking in New England winters.Clothing
Waterproof Shell Jacket
I love my Outdoor Research Foray GORE-TEX jacket (pictured in the header image). It’s reliably waterproof and has withstood many bushwhacking routes without any damage. I bring it with me on all of my winter hikes.
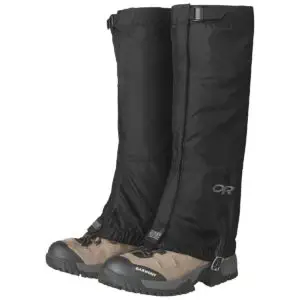
Waterproof Gaiters
In unbroken snow and arctic cold, the wind and snow always manage to sneak in between boots and pants cuffs. Outdoor Research Rocky Mountain High Gaiters provide a nice seal around boots and pants, helping to keep my lower legs and feet dry and warmer.
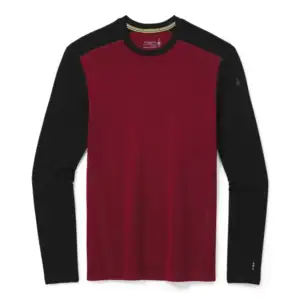
Long-Sleeve Heavy Wool Baselayer
I’ve owned a Smartwool Merino 250 Crew Midlayer since 2015 and it’s in constant use. I literally wore through one of them, though it took 5 years of use to start disintegrating. It’s lightweight when compared to a light jacket but it’s heavy enough to use on its own as a warm layer underneath a shell for summer hiking. In summer, it’s my sleep shirt and long-sleeve layer; in winter, I use it as part of my layering system.
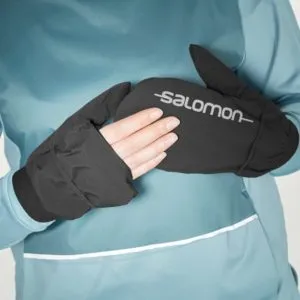
Mitten Shells
For shoulder season hiking and running and for winter ascents where I’m warm, I love my Salomon Bonatti Mitten Shells. They’re waterproof, windproof, fold back to allow venting, and take up almost no space. They’ve been invaluable in navigating the quickly changing weather in the White Mountains, like when I faced a 10-degree windchill above treeline during a September Hut Traverse. They can be worn alone in warmer weather and there’s plenty of space to wear a glove or glove liner underneath. I’ve worn a wool glove/shell combo comfortably down to zero, provided I’m warm and moving.
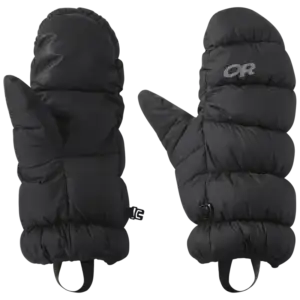
Down Mittens
For times when the temperature drops and my hands need a little bit extra warmth, I love my OR Transcendent Down Mitts. They’re marketed as down booties for the hands, and this is totally true. I describe them as sleeping bags for my hands! I bought them on a whim when I saw them on sale, and I’ve been incredibly happy with them. They have a sewn-in strap to hook them to a carabiner, making them easy to hang from my pack so if my finger dexterity disappears because my hands are too cold, I can easily pull these on and warm up my hands. Initially, I was worried they wouldn’t hold up to the strain of winter hiking, but so far, the seams have held and the soft fabric has survived nicely!
Face covering
When the temperature drops and I need something to help warm the air before it gets to my lungs, I use a Buff wrap. It’s warm enough to keep my lungs happy and light enough I still feel like I can breathe. In cold conditions, it will eventually freeze to the shape of my face, making it easy to keep in place.
Footwear
Boots
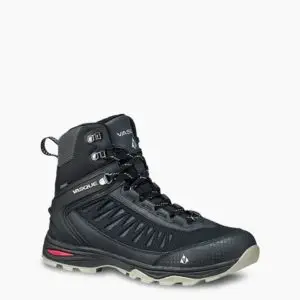
I have Raynaud’s Syndrome and so I am a fine connoisseur of the various stages of cold toes. I’ve spent many winter hikes debating and calculating how long it’s been since I could last feel my toes and when exactly I should start worrying about frostbite and gangrene. Finding insulated boots for my winter adventures has made them decidedly more comfortable. For warmer temperatures, I’ve used Vasque Coldspark boots which have 200g of insulation. They’re warm and fit close to my foot, wearing like a standard hiking boot, letting me keep my full ankle movement and foot dexterity. The one downside I’ve found is the Coldspark boots lost their waterproofing relatively quickly. Reapplying spray waterproofing has helped, but they’ll still become saturated relatively quickly. Regardless, they’re a comfortable insulated boot for winter adventures in warmer temperatures.
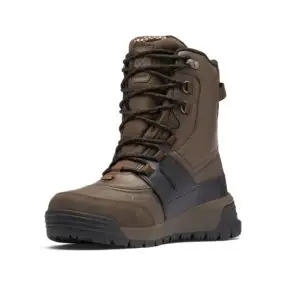
 My acquisition this season has been a pair of Columbia Bugaboot Infinity boots with 400g of insulation. I’d been looking for a different brand and style, but due to supply line issues, I wasn’t able to buy the ones I’d initially wanted. I wear wide men’s shoes, and it’s been remarkably difficult to find insulated boots in wide sizes. Enter the Bugaboot! It’s a heavier boot, and I do lose some foot dexterity, but it makes up for that downside by being cozy, warm, and waterproof. I’ve worn these for 10+ hours in subzero temperatures with the boot always covered in snow and I’ve been able to feel my toes the entire time (which isn’t something I can say for most shoes, even in summer)! They do include leather in the boot construction, which means these do have a break-in period. Once I broke them in, they fit my foot more closely and I found them much more comfortable. If you decide to buy a pair, just know they are sized very large. I normally wear men’s 8.5 wide, bought men’s 9 wide, and wish I’d bought men’s 8 wide. My solution has been to wear 2 pairs of socks; that seems to fill up the shoe volume nicely.
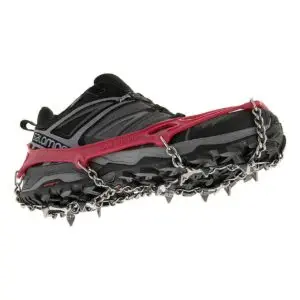
Traction
For packed trail and icy areas, traction for shoes and boots is critical. I’ve used both Hillsound Trail Crampons & Kahtoola Microspikes and have worn through them both. I haven’t detected a difference between them, and have no preference. I typically buy whichever one is most on sale. I’ve received excellent customer service from both companies whenever I’ve contacted them. While there are many knock-off versions available online, know that they will perform according to price. I’ve bought a few pairs of cheap ones for friends who weren’t sure winter hiking was right for them; they typically last for a handful of hikes and then the links stretch and fall apart. If you intend to hike or run with them, particularly on terrain that might have rocks or where gear failure could be a problem, I would highly recommend you spend a little more money and buy the real thing. These links are welded and will survive and thrive in most conditions.
Snowshoes
For situations where trails are not fully packed down, the temperatures are above freezing and you don’t want to create large holes in the trail for others to fall into, or where you might need to break trail in freshly fallen snow, snowshoes are your friend. They’re more work than hiking, but at the point that you need them, they will be easier than trying to hike without them. While there are racing snowshoes that are extremely lightweight, these snowshoes are primarily meant for floatation on packed trails. They also typically lack the big grippy teeth needed for more substantial mountain climbing. And at the end of the day, they’re very expensive and you won’t want to break them by taking them into rough conditions. If you’re a trail runner and thinking of heading out into the backcountry, I’d recommend buying a different pair of snowshoes just for that.
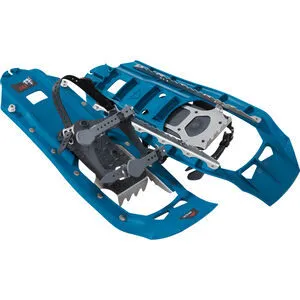
For those starting out who maybe aren’t sure if winter hiking and snowshoeing is for them or those with a smaller budget, I’d highly recommend the MSR EVO. It has a hard plastic shell and large metal teeth that withstand any abuse you might dish out. I have had the same pair of EVOs for four winters and they’re still in perfect working order, despite dragging them along open rock summits and walking across pavement.
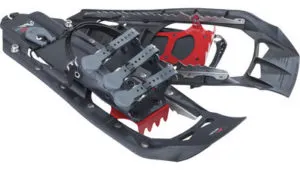
Last year, I decided that I’d spring for the EVO Ascent. The primary difference between these models is the Ascent has heel lifts. These are glorious support bars you can flip down to hold your foot into a more pointed position, to keep the snowshoe teeth engaged while you’re climbing uphill. Otherwise, you have to use your calf muscles to keep the snowshoe teeth engaged, or you’ll slide back down the hill. They’re wonderful, with all of the benefits of the basic EVO with a few simple upgrades. If you want a solid set of snowshoes with those upgrades, I’d recommend you buy the Ascents rather than the basic EVOs. Other options I’ve seen lauded for their performance are the EVO Lightning Ascent and the Tubbs Flex VRT, though I haven’t had the opportunity to try either. There isn’t a weight difference and for now, the EVOs continue to perform well!
Gear
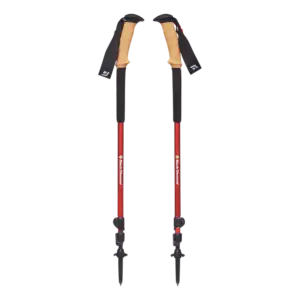
Trekking poles, with snow baskets
My go-to trekking poles are the Black Diamond Trail Ergo Cork Trekking Poles. They’ve survived everything I’ve thrown at them and kept on going. I’ve hiked with these to the point that the wrist straps disintegrated! They’re a true workhorse and they perform just as well in winter as they do in summer. The one addition I make in the winter season is to switch out the standard trekking baskets for snow baskets. These help keep the trekking poles towards the top of the snow and offer a wider, more stable base to push off of. The one downside to snow baskets is they’re bigger – so if you’re navigating through a bushwhack or similarly tight area, they can get caught on things. Regardless, I find them to be an invaluable addition to my winter trekking pole set-up.
Water bottle
For hiking in below freezing temperatures, I’ve found that wide-mouth bottles like a standard 32 oz Wide-mouth Nalgene water bottle are the slowest to freeze closed. An added benefit to the more robust bottle is it can withstand boiling water; for cold days, I start with boiling water in my bottles to give me more time before they’ll freeze closed. On the coldest days, I’ll also bring a Thermos with boiling water, to add to my Nalgenes throughout the day to defrost them and turn the ice back to liquid.
Water bottle insulation sleeve
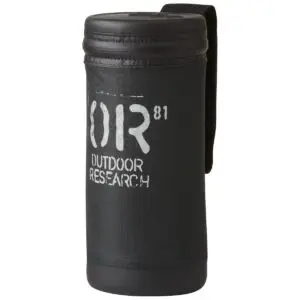
And last but not least, I always bring an Outdoor Research Water Bottle Parka for my water bottles. There’s a handy velcro piece to strap it to my backpack waist belt, and it helps slow down the speed at which the bottles freeze. Another similar option comes directly from Nalgene, though I don’t have personal experience with it.
While this list is meant to highlight winter gear essentials that a hiker used to three-season conditions might not think of, it isn’t an exhaustive list. What is an essential piece of winter hiking gear in your kit?
This post contains affiliate links. I earn a small commission on sales via these links at no additional cost to you. If you'd like to support me, please purchase products through the affiliate links. Thanks!
Aubri (‘Data’) Drake (they/them) is a queer, transgender, and nonbinary writer, fastpacker, and ultrarunner. They’ve been published in a number of different mediums, including the Green Mountain Club’s Long Trail Magazine and a nonbinary anthology published by Columbia University Press. Aubri has thru-hiked the Appalachian Trail, Tour du Mont Blanc, VT Long Trail, John Muir Trail, Tahoe Rim Trail, New England Trail, Cohos Trail, and are 50% done with the Pacific Crest Trail.
They’ve also completed the Northeast 111 400 Footers, as well as the New England 67 4000 Footers and the New England Hundred Highest in winter. Aubri has run 50k, 50mi, and 75mi distances and are looking forward to their first 100-miler this year. Aubri is a member of the All In Trail Running Collective.